DIY Holiday Gift Tags
Author: Cheryl Kilbourne-Kimpton
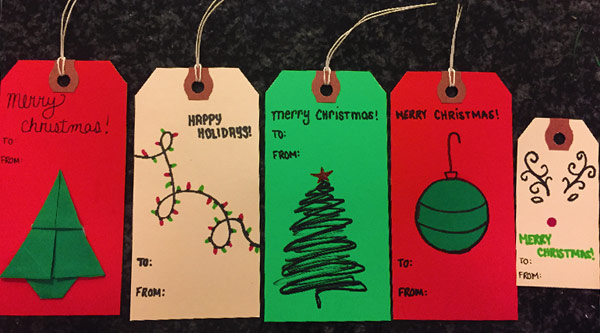
We all know that the key to a good holiday gift lies in the presentation. And, of course, no wrapping job is complete without a gift tag. Now, sticker versions are all well and good. But the true gift wrapping connoisseur opts for the old fashioned kind that you tie on. These tags are great because you can have some fun with the design and really personalize them.
DIY Holiday Gift Tags-Getting Started
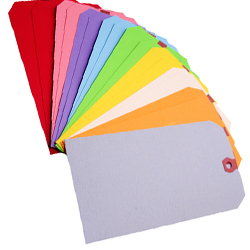
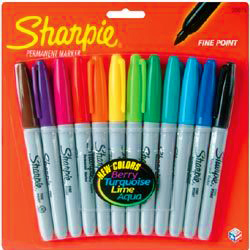
To get started, purchase some blank tags (similar to the ones pictured below). They’re typically available in a variety of colors. You’ll also want to get additional crafting items such as colored markers, string, washi tape, a glue stick, and scissors. Once you’ve collected your materials, you’re ready to begin!
DIY Holiday Gift Tags-Christmas Lights
For one design option, consider creating a string of Christmas lights. Fear not; it’s really quite easy! First, draw a swirly line. It can go in any direction you like, just make sure you leave enough room to write a message (or, at the very least, to include a “To” and “From”). Next, add some lights by taking a colored marker and making little oval-shaped dots that extend from the swirly line. When you’re finished adding lights, simply draw a small, black line at the base to provide a little more definition.

DIY Holiday Gift Tags-Christmas Tree
For an alternative design option, you might want to create a Christmas tree. This one is also rather easy; just scribble a line in the general shape of tree. Voila! You can even add a star at the top if you’re feeling saucy! Of course, don’t forget to leave some space above the tree for a message.

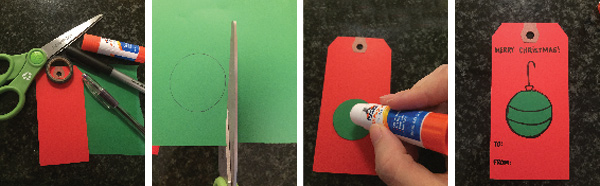
DIY Holiday Gift Tags-Christmas Ornament
Another great gift tag idea – design a little Christmas ornament! This one calls for a few crafting tools – scissors, glue, markers, some colored paper and a roll of tape. I use the roll of tape to trace a circle (though you could technically use anything round). After tracing the circle, cut it out and glue it to the center of the tag. I typically keep my ornaments rather simple but you can add decorative touches if you desire. You should have some room for a message (or a “To” and “From”) either above or below your ornament.
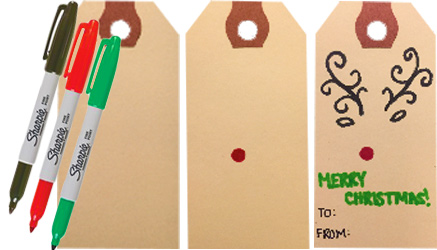
DIY Holiday Gift Tags-Rudolph
For a fourth option, try a minimalist depiction of Rudolph the Red Nosed Reindeer! All you’ll need are some colored markers (and a gift tag – duh) for this one. Start with a red circle in the center and then add the antlers. I like to make mine very curly and stylized (for some antler flair) but you can design them however you prefer. Once again, you should have some room at the bottom for a message.
Finally, for a homemade gift tag that’s sure to impress, you might also consider creating an origami tree. If you’re unsure of how to make one, consult this handy tutorial https://en.origami-club.com/xmas/tree/tree/. Once your tree is complete, you just need to glue it to your tag (and write a quick message above).

When all of your tags are finished, thread some string through the hole so you’re able to attach them to your gifts.
And get ready to spread some holiday cheer!