Tie-Dye For The Whole Family
Author: Kimberly V Kay
Have you run out of things to do? Are you looking for some fun projects? Maybe a project that incorporates learning, creativity and offers a really cool finished product? It’s time to try Tie-Dye for the whole family.
Tie-Dyeing T-shirts are simple, low cost and unlike the dinner, I made last night, it is impossible to destroy. There are several different methods for Tie-Dye, you can even make up your own. But we will give you instructions for two methods. Everything you’ll need to get started is currently in stock at MWS.
Tie-Dye For The Whole Family: Squirt Bottle Technique
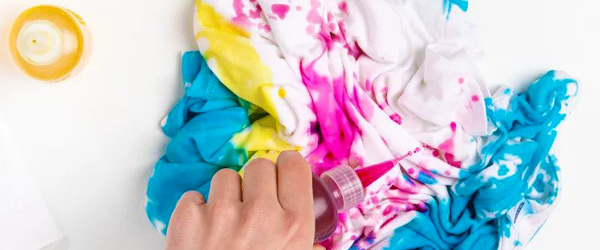
The first Tie Dye method is “The Squirt Bottle Technique” This technique of tie-dyeing enables you to use multiple colors. It’s even perfect for single color tie-dyes since you are able to apply the dye precisely where you want it to be. The dyes are mixed with very hot water in a concentrated amount, poured into squirt bottles, and then applied to the tied fabric to create colorful designs.
Supplies:
T-Shirts or any clothing made of natural fabrics
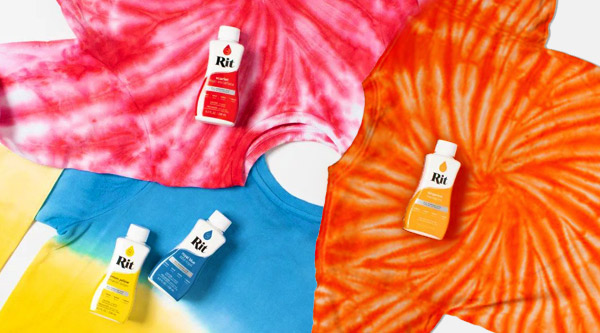
Rit ColorStay Dye Fixative (Recommended)
Baking Rack and Tray
Measuring Cup
Microwave (Optional)
Plastic Table Cover
Tie-Dye For The Whole Family: Instructions
- Before dyeing, remove any visible stains on the fabric. This will help achieve uniform color results when dyeing. Prewash item in warm, soapy water. This helps to remove any finishes that may interfere with dye absorption.
- Lay fabric out on a flat surface.
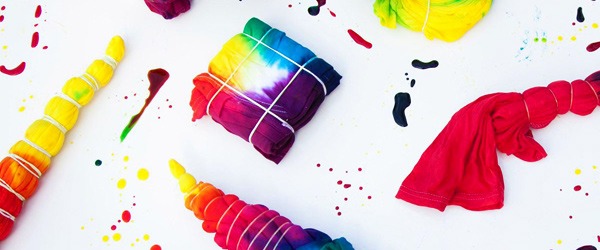
- Traditional Tie Dye: Pinch, pleat or fold the fabric to make a design. Wrap rubber bands tightly around fabric at various points. The rubber bands act as a resist and create white spaces. The more rubber bands you use and the tighter they are wrapped, the more white space there will be.
- Other Designs:
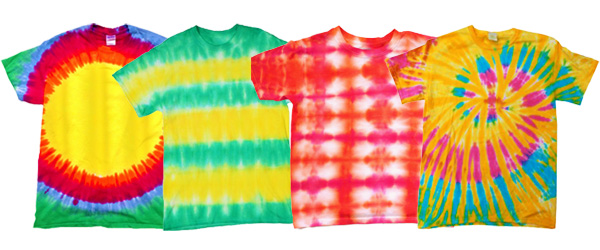
- Sunburst: Pinch a section of the fabric or where you want the center of the circle to be. Pull it up toward you to make a tee-pee shape. Then pull up more of the fabric for a larger circle. Close one hand around the point of the tee-pee and tie it off with a rubber band; then add rubber bands down the length of it.
- Stripes: Fold shirt vertically or diagonally, like an accordion or fan, in 2” to 3” wide folds. Then wrap with rubber bands every 2” to 3” or as desired.
- Checks: Accordion pleat fabric in 2” to 3” wide folds. To achieve a sharp line, press folds with an iron. Then accordion pleat strip into a square. Wrap a rubber band loosely around the square fabric in both directions.
- Spirals: Decide where to place the center of the spiral. Then position your fingers around the center point and slowly begin to twist fabric in a spiral direction. Loosely wrap rubber bands around the fabric to hold spiral together.
- Dip fabric in water; squeeze out excess water. Set aside.
- Wearing rubber gloves, mix 2 tablespoons of well-shaken liquid dye or 1/2 teaspoon of powdered dye with two cups of hot tap water. Scale back the concentration to 1 tablespoon if using Rose Quartz or Tan.
- Add 1 tablespoon of salt.
- Pour into a squirt bottle. Shake well.
- Repeat for each color.
- Place fabric on a baking rack with a tray under it. This is very important because it keeps the dye from puddling under the fabric. Squirt each dye color on fabric as desired.
- Tip: Plan to put adjacent primary colors (red, yellow, blue) or secondary colors (orange, green, purple) next to each other. In the areas where they run together, they will blend together and create a third color.
- Keep paper towels handy to remove any dye that seeps into an area where you plan to place another color.
- To set the dye:
- We strongly recommend using your microwave, as long as the fabric does not have any metal parts on it. Wrap the dyed fabric in plastic wrap and seal the edges. Place the wrapped fabric on a paper towel in the microwave and heat for 2 minutes. Plastic will puff up, creating a heat chamber that helps bond the dye with the fabric. Once the microwave is done, remove the shirt and open the plastic, letting it cool down.
- If a microwave is not available or feasible to use and it is a hot sunny day, lay the wrapped fabric out in the sun for an hour.
- After using the microwave or letting the fabric sit in the sun, we also recommend using Rit ColorStay Dye Fixative while the fabric is still tied up and before washing. It enhances the color, increases color retention, and prevents dye from bleeding into white areas.
- Rinse in cool water until rinse water begins to run clear.
- Carefully remove rubber bands with scissors and unfold the fabric.
- Wash in warm water with a mild detergent, rinse and dry.

Tie-Dye For The Whole Family: Immersion Technique
This is the method I always did as a kid. It enables you to dye multiple items at once. Also if you want to dye synthetics this is the technique for you.
The first step is to check the care tag for the fiber content of the fabric you plan to dye. If the fabric you plan to dye is a natural fabric (such as cotton, linen silk, ramie or wool), rayon or nylon, then select the instructions for working with Rit All-Purpose Dye.
If the fabric you plan to dye is synthetic (i.e. fabric containing more than 35% polyester, acrylic, or acetate), then select the instructions for working with Rit DyeMore for Synthetics.
Rit All-Purpose Dye Instructions:
Supplies: Rit All-Purpose Dye
Container (Or Containers If Using Multiple Colors)
Salt (If Dyeing Cotton, Rayon, Ramie or Linen)
Vinegar (If Dyeing Nylon, Silk or Wool)
Large Metal Spoon
Measuring Cup
Plastic Table Cover
Tie-Dye For The Whole Family: Instructions
- Begin by following steps 1-5 under the Squirt Bottle Technique above.
- Now it is time to create your dyebath(s). One to three colors can be used. Each color gets its own dyebath.
- Cover work area with plastic table cover and have paper towels handy to protect against any possible spills.
- Fill a plastic container(s) with three gallons of hot water. The water should ideally be 140ºF. If tap water is not hot enough, heat water on the stove and add to the dyebath.
- To enhance the color: (1) add one cup of salt when dyeing fabrics containing cotton, rayon, ramie, or linen; (2) add one cup of vinegar when dyeing fabrics containing nylon, silk or wool.
- Add 1 teaspoon of dish detergent to help promote level dyeing.
- As a general guideline, one liquid bottle or two powder packages dyes up to two pounds of dry fabric (about 6 to 8 size small t-shirts). If using powder, dissolve the powder in 2 cups very of very hot water before adding it to the dyebath.
- Wearing rubber gloves. add well-shaken dye or powder package(s) to dyebath.
- Wet fabric.
- If using more than one color:
- We recommend starting with the lightest color.
- It’s usually best to put adjacent primary colors (red, yellow, blue) or secondary colors (orange, green, purple) next to each other. In the areas where they run together, they will create a third, great-looking color. For instance, Scarlet and Golden Yellow will produce orange; Royal Blue and Kelly Green will make aqua; Fuchsia and Royal Blue will create purple.
- Immerse your wrapped fabric in the lightest color dyebath for 4 to 10 minutes, up to 30 minutes, stirring occasionally. If using multiple colors, immerse a section of the fabric in each color. The longer the fabric is in the dye bath, the darker the color will be. Please note that fabric will look darker when wet and will dry lighter.
- Repeat until all colors are used.
- If you are looking to create a marbled effect, cut the rubber bands with scissors, and unwrap the fabric. Rinse it well in cool water. Squeeze out excess water. Then, wrap again. Immerse in the next darkest color.
- When the desired color is achieved, remove wrapped fabric from the dyebath. Squeeze out excess dye and rinse in cool water. Do not remove rubber bands.
- We strongly recommend using Rit ColorStay Dye Fixative immediately after dyeing and before washing. It enhances the color, increases color retention, and prevents dye from bleeding into white areas.
- Rinse in cool water until rinse water begins to run clear.
- Carefully remove rubber bands with scissors and unfold the fabric.
- Wash in cool water with a mild detergent, rinse and dry.
Tie-Dye For The Whole Family: Make A Mask
MWS now sells some face masks that would be perfect for adding your own special touch. How cool would it be for your kids to Tie-Dye their masks? Since we will all be wearing them for a while, why not make them unique and fun. Click here to see the reusable and washable masks available and then work your magic!

Tie-Dye For The Whole Family: Your Masterpiece
Tie-Dyeing with the whole family is a lot of fun. Imagine all of the amazing designs you can create together. You might even make matching t-shirts and then make a family video to show off your creations. The possibilities are endless. As always MWS is here to support your inner Picasso with all the great products that you will need.
While our physical store is closed, our online store is up and running. Just order online today and we will ship your order right out to you via UPS.
As always, we are very grateful for your business.